|
I had some problems with one of my Happijac electric camper jacks. It was
working very slowly and finally seized up. Before replacing it with a new one,
I thought I would see if I could resurrect it. I found a very helpful forum
topic on rv.net outlining how to disassemble the jack in order to re-lubricate
it. Along the way, I discovered a few things not discussed in the original topic
and added my own, hopefully helpful, comments to the thread. I have taken a few
pictures and noted some of my own comments here, but most of my comments are in
the
rv.net forum thread.
Here's a summary of my attempt to fix the jack. I would caution anyone
disassembling one of these jacks to note very carefully how things come apart as
there can be some surprises. When I disassembled my bad jack I found that the
acme threaded rod was rusted into the recirculating ball mechanism in the lower
leg. I sprayed it with Blaster and let it sit a while. I was then able to
unfreeze the acme rod by turning it out. I wire brushed the rod, re-lubricated
it with white waterproof, high temperature grease, and ran it in and out a few
times. I wiped the rod clean each time I ran it out to clean off the rusty
grease. After re-installing the jack, it would still bind up when lowering the
camper. I next attacked the drag brake, which is metal rotating on metal with
the full weight of the camper on it. I cleaned up the galling on the brake
surface (squarish plate in the rv.net thread pictures) and polished it. I lubed
the braking surface and put the jack back together again, but the jack would
still bind when lowering the camper. My conclusion is that rust had damaged the
re-circulating ball mechanism, so I ended up replacing both front jacks with a
new pair of Happijac 4600s.
Below are a few pictures I took, and also some other observations I have
about the 4500 and 4100 series Happijacs. This includes some info about just
what is in the lower leg of the jack.
The original thread showed the insides of a Happijac 4500. I also
disassembled a Happijac 4100 and posted the pictures showing the differences.
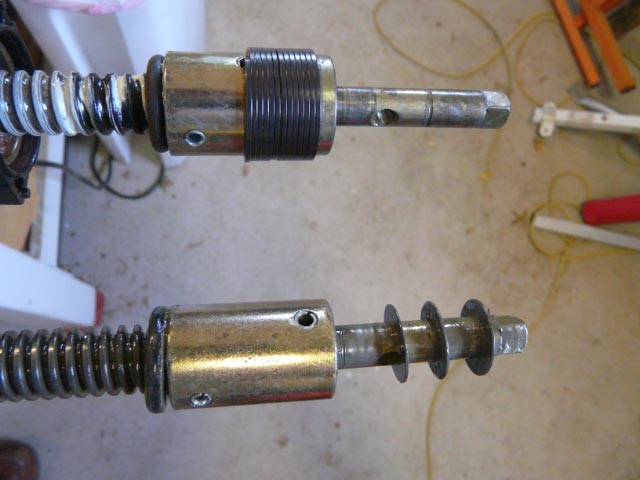
The top image in the picture above shows the internals of the 4500 and the
bottom image is the 4100. The 4500 incorporates a drag brake when the camper is
being lowered, but the 4100 does not. Both jacks use a thrust bearing to carry
the weight of the camper. The thrust bearing is the center of the 3 disks on the
shaft of the 4100. The other 2 disks are the thrust bearing races. The thrust
bearing and races in the 4500 are contained between 2 barrels which are held
together with a clinch spring. Details of the 4500 mechanism are shown and
described very well in the rv.net thread.
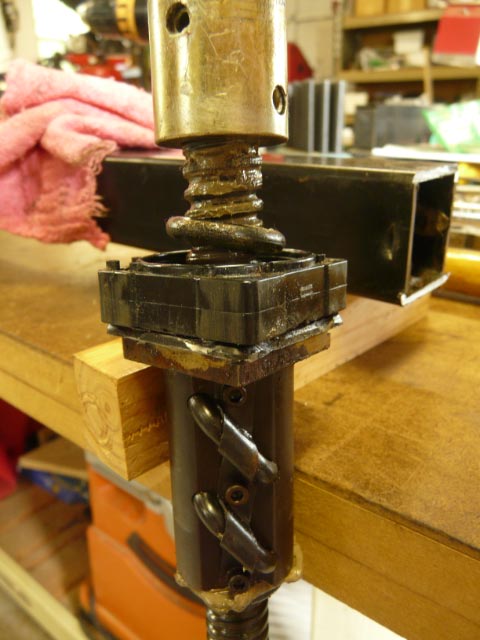
I decided to take apart the lower leg of the bad 4500 jack and get a closer
look at the inside. At the top of the leg there is a re-circulating ball
mechanism that is peened into the top of the lower leg. Instead of trying to
reverse the peening to get the mechanism out I decided to use a quicker,
destructive method. I sawed into the square tubing just below the peening. I
used my horizontal bandsaw to cut all 4 sides. The result is that the RB
mechanism came out with about a 1/8" section of the leg attached. I have not
removed the RB mechanism from the shaft as I suspect this would release all of
the balls. In fact, I did back it out far enough to see the balls and managed to
remove one of them. As I suspected, the ball is rusty and pitted from moisture
intrusion.
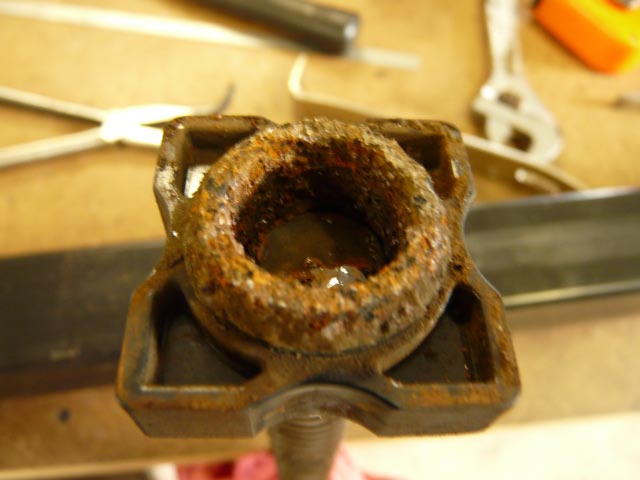
The picture below shows the RB mechanism. In the background you can see where
the bottom leg was cut.
The next picture shows what is at the bottom end of the acme rod. Also note
all of the rust on that end.
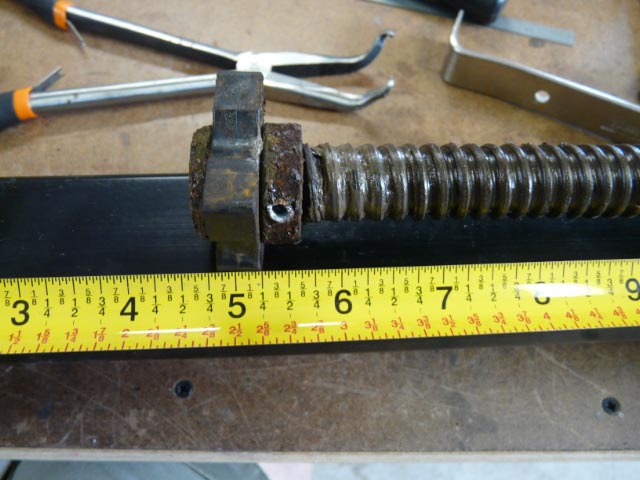
The next picture shows where the bottom end of the rod is when the jack is
fully lowered. The tape measure shows the distance from the top of the foot pad.
The only way to lube that plastic to metal friction point would be to drill a
hole in the bottom leg at this point in order to be able to spray lube it. Note
that you would still have to disassemble the jack in order to get to the hole.
Lastly, the picture below shows what came out of the lower leg when I turned
it upside down and tapped it on a shop rag on the floor.
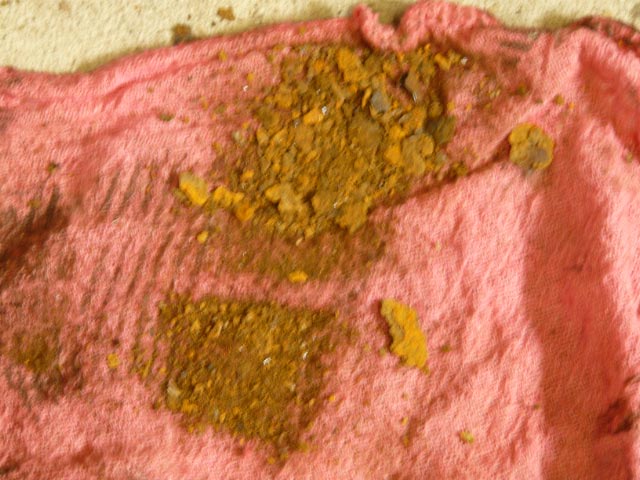
From these pictures you can see that there has been a considerable amount of
moisture in the lower leg over the years. Would a hole drilled into the bottom
of the foot pad allow any accumulated moisture to run out? No way to tell just
how much ever accumulated, but you can see it would have to be in the
neighborhood of 5" to reach the bottom of the rod. |